Sunday, August 26, 2012

Timber! (I got a chainsaw)

I haven't had much to blog about lately thanks to the Florida weather. The afternoon rains have kept me indoors. This past week I was sitting at home with my dogs, bummed that my weekday kayak trip was rained out, when I heard a big crash outside. I looked out the window to find a pine tree that had fallen from the woods into my front yard.

tree down

The wind from the afternoon storm had caused the trunk to snap in half about 7 feet up on the tree. Luckily the tree landed in my front yard, and not on my house!


Great, now I finally had an excuse to go out, and buy a chainsaw. I've wanted one for a long time. After a little research on the internet, I found the Homelite 14" electric chainsaw. I wasn't sure if this little electric chainsaw could do the job, but at almost 1/3 of the price of the gas powered chainsaws it was worth taking a chance on. After all, it was rated 4.5 out of 5 stars on Home Depot's website. I picked up the chainsaw for less than $50, and a quart of bar & chain oil.

electric chain saw

The Homelite electric chainsaw is self-oiling. All you need to do is fill the oil reservoir, and plug it in to an outdoor extension cord. After the first few cuts, you will need to tighten the chain by turning the chain tensioning knob clockwise. Now you are ready to cut. Just keep an eye on the oil window, and refill with bar & chain oil when it gets low.

Homelite chainsaw


Time to tackle this tree...


Thanks to this little electric chainsaw it looks like I'll have plenty of firewood for our next bonfire... And there's more where that came from.

stacked firewood


As I type this Tropical Storm Isaac is bringing rain & wind to Central Florida. I might just have some more use for this chainsaw sooner than I thought...

Thanks for reading. Please comment, follow, "like", and share.

Thursday, August 16, 2012

BBQ - Pulled Pork

I love me some good BBQ!  If I ever had to choose my "last meal", you can bet it would be some good ol' southern barbecue, because nothing beats the smell of a big slab of meat smoking over some hickory wood.  I'd like to imagine that is what Heaven will smell like.

Whole Hog

Like any guy, I've always liked to cookout on the grill, but didn't get into true barbecue until about 4 years ago.  Yes, there is a difference between grilling and barbecuing. Grilling is done hot & fast over direct heat. Barbecue on the other hand is cooked low & slow over indirect heat.  

Dustin's Bar-B-Q

My first smoker was a an electric bullet-style smoker that my uncle found at the end of someone's driveway set out for the trash.  I took it home, knocked the rust off with some steel wool, put a few extra screws in to support the shelves, rubbed it down with peanut oil, plugged it in, and ran a few rounds of smoke through it to season it.  It was a great little smoker, and I still have it today, but this is America where bigger is better, so two years later I picked up an offset smoker. I found it at (The) Walmart on clearance in the garden center for less than $40.  Now, after years of practice, I am smoking some of the best competition pulled pork around.  Just ask anyone who has been to my annual BBQ & bonfire bash (which we're planning for the 1st weekend in November this year, btw).


Alright, you came here for barbecue, I'm going to show you how to do pulled pork my way (almost. I still have my secrets).

  • THE MEAT: Pulled pork can be made from either the butt (shoulder), or the shank portions of the pig.  Good pulled pork is made from the butt (the shoulder, not the ass). It is commonly referred to as the Boston Butt.  I like big butts (and I cannot lie), and try to buy them in the 7 1/2 to 9 pound range for smoking. Bone-In of course for better flavor. Don't worry about trimming off the fat cap, it will melt off during the cooking process. Remember, fat = flavor!

boston butt


  • INJECTING: While smoking takes care of the flavor on the outside of the meat, injecting takes care of the flavor on the inside. Now I'm not going to share my exact injecting recipe, but apple juice, apple cider vinegar, BBQ sauce, liquid smoke, and even Coca-Cola are not uncommon ingredients to be injected into a pork butt. Experiment with it until you find something you like.


  • THE RUB:  After injecting, pat dry with paper towels, and apply a coat of yellow mustard to your pork butt. This will help tenderize the meat, and give something for your dry rub to stick to. Next, apply your rub. I like to use a rub that contains salt, paprika, brown sugar, onion powder, garlic powder, black pepper, cayenne pepper, and cumin.  I make my own rubs because I have found that most commercially made rubs contain too much salt. Don't skimp on the rub. Get in there, and rub that butt good... Are you done? Now wash your hands, then wrap your pork butt in a few layers of plastic wrap, and refrigerate for at least 8 hours. Over night is better.


  • PREPARING THE SMOKER: You'll need to soak your wood chunks in water for about 20 minutes to keep them from catching on fire. Use wood chunks or logs, but try to stay away from wood chips they burn up too quickly. The type of wood used when smoking can greatly change the flavor of the meat. Only use hardwoods like hickory, oak, mesquite, citrus, apple, or pecan to cook with.  Softer woods like pine contain a lot of resin that will give your food a nasty bitter taste, and are better off used as fuel for your bonfire (more on that later).  I like to smoke my pork over hickory with a little apple wood mixed in. When using an offset smoker use a 4 to 1 ratio of wood to charcoal, and always use a charcoal chimney to start your coals, NEVER use lighter fluid. Don't add charcoal to the firebox until it is ashed over, and ready.  This causes too many problems with temperature control.  You will want your smoker between 235°F - 250°F while smoking. Don't forget to rub down the grates with a little oil to keep your meat from sticking.


  • SMOKING YOUR PORK BUTT: Remove the pork butt(s) from the refrigerator an hour and a half before smoking to allow it to come to room temperature. This would also be a good time to sprinkle on some of your leftover dry rub. Place your pork butt on the smoker over indirect heat with the fat cap facing up. Close the smoker, and walk away.  Do not open the lid to look at your meat. If you're looking, you're not cooking. You've done the hard part, now sit back, and drink a beer or 6 because your pork butt needs to smoke for 10 - 12 hours until it reaches an internal temperature of 195°F.  You will need to add wood/charcoal about every 45 minutes to maintain your smoker at 250°F.

pork butt on smoker


  • RESTING YOUR BUTT:  When your pork butt reaches 195°F, remove it from the smoker, loosely wrap in aluminium foil, and place it in a deep pan. Be careful it will be hot! Allow your pork butt to rest for at least 1 hour before pulling. Place the pan into a dry cooler with a warm towel if you won't be eating it soon. It will stay hot for 3 hours this way. Don't pull your pork butt until you are ready to eat it! You will notice the pork butt giving up it's juices in the bottom of the pan as it rests. I use these juices make an awesome homemade BBQ sauce to pour over the pulled pork by simmering it on the stove with some of my dry rub, chili powder, apple cider vinegar, liquid smoke, ketchup, and brown sugar. When it comes to pulling your pork you have 3 options; chopped, pulled, or shredded. I prefer to hand-pull my pork even though it is a little more work. Just be sure to wear two pair of gloves if you go this route, because the pork will be hot.

pulled pork
pulled pork before sauce

It is a lot of work, but it's the best BBQ pulled pork you will ever eat! My family says it's better than 4 Rivers Smokehouse (for those of you in the Central Florida area), and I would have to agree even though 4Rivers has the best baked beans on this planet + fried pickles.


  firepit


Once a year my wife, and I throw a BBQ & Bonfire Bash where I smoke two of the biggest pork butts I can find for about 20 of our friends & family. We have BBQ, beer, cornhole games, college football on multiple TV's outside, and when the sun goes down a bonfire in the back yard. Having a barbecue is a great way to get everyone together, and have a good time.


Thanks for reading. If you enjoyed this post, please comment, follow, and share.

Sunday, August 12, 2012

SCUBA Diving the Blue Heron Bridge

I finally got around to writing up a review for the Blue Heron Bridge dive I did while on my family vacation a month and a half ago. Hey, better late than never, right?


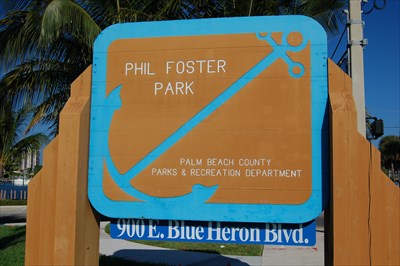
The Blue Heron Bridge is located in Riviera Beach, FL at Phil Foster Park. This is a public park with free access, parking, restrooms, playground, boat ramp, picnic tables, and a fresh water shower to rinse gear after your dive.

Phil Foster Park Blue Heron bridge

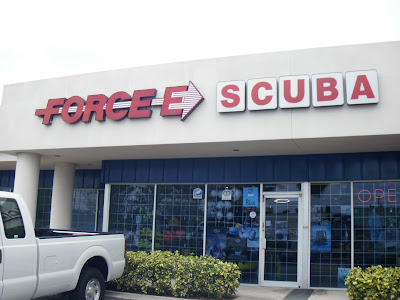
The best time to dive the Blue Heron Bridge is during high tide. The best visibility, least current, and best photo opportunities will be from an hour before high tide to an hour after high tide. This gives you a 2 hour window to explore the 2 different dive sites under the bridge. Check the Port of Palm Beach tide chart before you go, or stop by Force-E Scuba on Blue Heron Blvd. to plan your dive.  A dive flag is required when diving or snorkeling the Blue Heron Bridge. 
Dive Shop Force-E SCUBA

Palm Beach County requires a permit for night diving at the Blue Heron Bridge. Most of the area dive shops have these permits, and schedule night dives around once a month.

The beach under the bridge
There are 2 sites you will want to explore during your dive. The max depth will be less than 20 feet, so you will have plenty of time to explore both sites on a one tank dive.  We started with the west side of the park.

The view of your easy beach entry
After entering  the water (viewing photo above), head to your right to the west site. Here you will find bridge pilings where lobsters like to hang out. Take your time, and keep your eyes open, you never know what you may find. I have seen starfish, lobsters, stingrays, eels, even an octopus both times I dove here. Be careful to stay out of the main boating channel further west.

SCUBA Mom
Not a diver?  That's okay, even Mom can snorkel this site. This is as easy as shore diving gets, so there's no reason not to try it!

Me

Group photo

We saw a lot of lobsters here. The Blue Heron Bridge is a designated "no-take zone"... Too bad some people don't follow the rules (notice the lobster carcass above).

Bring a dive light to look in tight places. You never know what you may find.
I can't stress this enough, TAKE YOUR TIME & LOOK CLOSELY!


Octopus
Take your time... Look closely, or you'll miss it.
 The east side of the bridge has a group of sunken shopping carts, and a boat wreck in 12 feet of water that is loaded with fish waiting for you to explore.


To get to the boat wreck from the entry point under the bridge (as pictured above) head out to the left. you will notice a buoy that is tied of to the sunken boat. The shopping carts are located nearby.


A group of new divers was sitting, standing, and touching everything at this site, and managed mess up the vis for everybody else. Please watch your buoyancy here.


The Blue Heron Bridge is a very popular site for underwater macro photography. Check out some of the photos taken here.


I have been a certified Advanced Open Water / Enriched Air Nitrox SCUBA diver for over 7 years, and have been diving all over the state of Florida, and in The Bahamas. The Blue Heron Bridge IS the best shore dive I have ever done.  Get out there and dive it!


[UPDATE: As of August 2012, the new artificial reef & snorkel trail is open. More info can be found on the Palm Beach County website.]


That's all for this time. Thanks for reading. Please subscribe, follow, comment, and share.
 73CZH3YHMSN4